Wednesday, December 2, 2015

Eco printing, alpacas and time travel

What? It's December? When did that happen? :-)
I have run through 2 months of combining silk work and portraits and December simply brings a bit of panic into it!

I dug into the eco printing and have had some gorgeous results!
Various kinds of eucalyptus

It takes practice but in the end...the thrill (yes it is) is in not knowing what you'll create!

But knowing that I'm printing Nature's colors exclusively is another appeal to this art form.

I spent 10 days in October at the NC State Fair as the silk artist in the Village of Yesteryear
rose leaves from Seven Sisters

Heirloom roses and pineapple sage
and although it was tiring with daily 12 hour days, I met SO many people who were happy to add a scarf to their handmade collections!
November seems to have dissipated and I don't know where it went to. I do know that I am on a borrowed computer as mine bit the dust (although Best Buy is determined to make it work since it is under warranty) and I had no idea how many of my photos were on the other computer. Luckily I have Carbonite backup but having to make temporary folders to store work is time consuming.

I'll pop some portraits up in my next post...seems odd to mix them with the silk. :-)

Oh and I must add one more image....Bella! The newest member and a future supplier of fiber for adding some roving into some of my silk!


Meet Bella!

Tuesday, September 22, 2015

The search for dye plants

We spent a gorgeous day recently collecting sample plants of nature's bounty to do some "eco-dyeing" on silk scarves.
Our current roadsides are awash with wild helianthus and pokeberries. Wild sumac encircles abandoned ponds and we're careful to collect only what we will use.  But my own mini-farm offers up Rose of Sharon, wild buttercups, a lot of mimosa and pokeberry as well as grapes, dogwoods, oak, pear and maple...a lot of trees on my land that are soon to turn glorious colors.   In the meantime we go with greens, yellows...lol, even red clay and tobacco!

The bounty

Water from a spring and wild picking


 I soaked the scarves in a mordant, then layered our finds on top, covered them up, rolled and wrapped them and two days later, walla! Eco dyed scarves.

It's a lot of fun to collect, a lot of time to "do" and in the end, the appeal will be to a certain kind of scarf collector.  

But the search is inspiring, restful and a soothing "back to the earth" kind of methodology that I'll employ a bit more into my fiber art :-)

Wednesday, August 26, 2015

DIY hanging rack from a baby crib! (the practical artist!)

DIY hanging rack from a baby crib!

Taking off the pegged top piece on rail
As professional artists, we have 2 art studios on our property. The larger one is big, beautiful and built from a torn down 1910 house!
Our smaller one is my "cabin in the woods" and was a tired 10 x 20 storage building that we renovated for additional room in our ever expanding art business!

 So in my small Art studio that I use for my silk making, I needed a place to hang my scarves while I worked on them. I use an outside clothesline which is perfect for drying. But in between some stages of my techniques, I needed a place to gently hang silk without folding it or dropping it on the floor :-)
Crib rail hinged to wood attached to wall.
 The solution came in the form of parts of a free baby crib! Used cribs can be found at yard sales for next to nothing and the sides can be used for any number of creative projects!


My idea was to attach hinges to the bottom , attach it to the wall of my small studio and have it fold down from the top.  When in use, the lightweight chains would let me lower it to pretty much any height I wanted. I did not want it level, just out a foot or so from the top of the wall. When not in use, it folds back up to the wall and hooks with regular latch hooks :-)

Small chain, latches and hinges are easily found in any hardware store!

A little paint on the wood the piece is hinged to will make it look finished :-)

As you can see, the lightweight silk dangles easily from the rack away from the wall. It could be closed as well if I choose.
A perfect solution for everything from fabric to paper to your laundry room.

Raise the chains higher if heavier items will be hung. The ceiling is barn style so hanging this from the ceiling where the lights are was not an option-too high and the lights were in the way so this "Murphy style" rack was the perfect solution!

An easy DIY project accomplished in an afternoon or less! (Depending on the number of breaks and how long it takes you to find the tools you put down somewhere!)


Sunday, August 9, 2015

Kids Learning to Play like Kids!

I take my childhood for granted. But now I know that I, and my peers, were oh so fortunate to have grown up in the years that we did! These were the years where kids played outside all day, came home when all the neighborhood moms stood on the porches and stoops and called us in.....where we climbed trees, ran for the sheer joy of it, picked berries, built forts and our water parks were wading pools and water hoses!

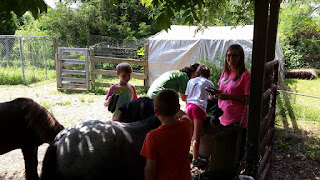
I re-create part of that in my art summer camps. And the kids have a ball! It is different because the kids work with art, outdoor play and critical thinking skills....and through it all I expect the grouped ages of 7-17 to work, play and create together. And they do!

Coming to our 2 art studios out in the country-both are our professional ones- in itself is an adventure. Being free to run at will outdoors down the secret paths of the maze, climb the maple and pecan trees, and in general, be kids, is actually a new experience for many of the students.  But by day 2, they are enjoying the freedom of outside activities and that pumps up their creative processes!

Collage 1


Enjoying the ponies


The lunch tree

Without a doubt the favorite tree!


  I hope to add more camps next summer-it's definitely something I have to bring in extra help as the camps can have up to 14 participants. Many are repeaters. Many are so improved by the 3rd day of camp-both artistically and physically! (who knew climbing trees was so hard?) 
So add to that mix-getting wet, dirty, loved by dogs, ignored by chickens (but collecting the eggs is fun!) running the secret trails....and you have the incredible experience that I so took for granted as a kid...(thanks Mom and Dad for letting me be a free range kid and artist!)

Tuesday, July 7, 2015

My "Don't Tell Mom!" painting series

It has been more than crazy at the studio! How can so much happen in 4 weeks?
So rushing through chores mid June, I tripped on a loop of bailing twine (that I had note and was going to do something about it!) went down like a ton of bricks and broke my elbow. Elbow! Who breaks their elbow?
My jeweler friend Ginger cuts off my wedding ring :-)
To top it off I was leaving for a facilitator conference the next day in the NC mountains...boy was I ticked! Wrapped up in a half cast, I went anyway and had a fabulous if not slightly awkward time :-)

SO I return in time to get ready for my 4 day summer art camp...this time I had help! I'll add the photos as soon as I find the folder :-(
Anyway in between all of that I have kept busy creating my non-commissioned art...just because! And just because is as good a reason as any so I have spent days just painting large happy canvases!
One of them, an acrylic on 30 x 30 canvas was selected to go on a catalog cover for the Blowing Rock Charity Horse Show...very cool! Steve putting in the graphics.

 
30 x 30 acrylic on canvas "Blowing Rock Horse Show"

 Yes-sort of Grandma Moses but people are loving it!

 Then I decided to go further-thinking of the years my twin and I rode like Indians on our New York farm, I decided to do my "Don't Tell Mom" series...they're big-30 x 40 canvases but oh what fun to create! 

We tried all sorts of tricks on our mares and somehow they yolerated our clumsy trick maneuvers.
One summer, our mares were off being bred at a farm in HIllsdale, NY and that summer we rode a little 13 hh pony called "Bobby." Conniving, tricky and ready to dump us in a moment, we kept him tuned for his younger owners who had been unable to stay on him :-)
#2 in my "Don't Tell Mom" series is "School's Out!" 30 x 40 acrylic on canvas

#1 in my "Don't Tell Mom" series, "Acrobats"
 So if these don't make you smile today, nothing will...
Enjoy the content and the colors and I'll be posting new ones shortly!

Tuesday, June 2, 2015

Driving the Night Road

Ever wonder what an artist thinks? Well here is one example :-)
An artist's musings......Driving the Night Road
(by M Theresa Brown)

I am one of the last to leave the parking lot after the night class I teach. I wait in my car until the taillights of my final student pulls away and I follow.
Soon I am on the back roads home. If I am lucky, I won't have any traffic behind me and I can wander the 18 miles home more slowly. I've made the trip often, and in all weather conditions. It's the warmer nights I love. With my windows down I can hear the night. Driving a leisurely speed, I can see the night.

I pass rural houses, the lights of a home life filtering through open curtains. An occasional glow of a TV flickering in a den. Outdoor lights peep through the woods in homes set back off the road. People's homes. A family. Their night time sanctuaries.
Part of my journey takes me by several churches. As I approach the stop sign by one of them I cannot help but notice that some of the graves in the cemetery have little solar lights. It's a nice thought I think. Someone wanting their loved one to have a nightlight.  Like a little earth bound star in the night.

Directly across the intersection is yet another church and I wonder, not for the first time, how these churches in the country fill their pews.  I always check out the the little white house next to the two churches. It's a non-assuming small white clapboard when I drive by it during the day. But on many of the nights that I pass it going home, it is transformed into something entirely different with its red light glowing on the front porch.
I ponder this anomaly of a mini red light district between two churches. It is easy to wonder all sorts of random thoughts. Is she open all night? Do people just stop by? Does she close shop at daybreak? Is she open on Sundays? I roll these questions in my mind, never coming up with an answer, as I leave the little intersection behind and travel on in the dark.

My attempt to photograph with my phone:-)

My headlights show pastures and fences and I scan the edges of the road for the ever present possibility of deer or a waddling possum. The traveling lights toss the shadows of trees into patterns that dance along the edge of the road as I drive. It's an interesting thought, bringing my own shadow with me and my mind wanders off into memories of shadow making.

I drive quietly. No radio, no music. I like to listen to the wind. As I approach the river, the incredibly loud chorus of tree frogs in the swamps signals my approaching turn.  Some nights, when I turn onto this short section of dirt road I often stop.   Listening to the tree frogs without the dopplar effect that comes with driving past is ear opening;  Nature's surround sound. I love this section. The night holds no fear for me. My headlights might flush a rabbit or two on this dirt road. I might hear a dog bark far in the distance.  More than once when I paused I have turned off my headlights to see the stars, brilliant on a clear night with no ambient light.  It is an isolated section of road and it is easy to imagine Big Foot coming out of the pine forests. The thought makes me smile as my imagination  wanders off again, this time into Big Foot territory.

My tires thump back onto the paved section of the road and I slowly make my way home. Past more homes, more shadows, more stars. Daylight shows me the details of what I only glimpse at night. But it is within my Night Drive circle of light that my senses fill, bringing  a certain peace and focus at the end of the day.

Thursday, May 14, 2015

My DIY art studio renovation!

DIY studio renovation!


Things are moving along with my "cabin in the woods!"
If you have been following me, you'll know that I have been renovating a 12 x 20 shed and turning it into a second art studio.  It's been taking a few months but bit by bit the big things get done, then the little things :-)

Below are some "in progress" photos of the north end of the building. 


The deck going in.


Here is the plain jane studio in the making.


In the back ground is the large studio-our workhorse location. In this one I have begun to move all the dyes, paints and supplies related to my silk designs


Deck being built.
We  re-purposed a used 6' sliding door for the north end of the studio!
The 6' sliding door going in
 And now, with the deck completed, we can enjoy an beautiful extension of our studio and work on it even as we complete some minor details inside! Hubby has wasted no time...not have our dogs!


Notice the wild roses along our pasture fence add screening and privacy...not that we really need it on our mini-farm but it is perfect for an artist's studio! 
heading out to the office takes on a whole new concept for me when this is one of my offices!

Sunday, April 19, 2015

Murals on your Kitchen Cabinets!

Murals on Kitchen Cabinets

Painting murals is not new to me. From my teens on up, I have painted scenes on walls, doors, commercial window displays and traveling circus trailers. (really!) In an earlier post you saw this mural below...now see the rest of the project completed above it!

Sometime it can go faster than painting the same thing on canvas that same size. Don't ask me why. it just does.
If you have followed my "cabin in the woods" renovation you'll know that my building came with cabinets recycled from a 1950's kitchen. The wood was that hard to find solid "thwunk" type wood found in your grandma's kitchen. And it also meant it came with that dark varnished look so popular once upon a time!
I removed the doors...sanded them, then painted them...more than once, with white primer.
White doors with a mural on panel below it that I painted a few years ago
White walls, white ceilings, white cabinets. Something had to change before I started moving my art supplies into it.

I went to my computer and pulling from my folder of "random traveling photos" that I accumulate for ideas, I thought.....actually I knew what I would do if I went one of two ways-mountains. Or beach. I settled on mountains :-)
Sequence of steps

So I painted in the sky, added the clouds and then started the background. It's a whole lot easier to add the foreground after the background is completed. Otherwise you will try to paint around a tree or around the leaves and it doesn't work.....at this point I tossed the pencil and just started winging it. Take a look :-)

Adding Mountains and tree details
You can see where this is headed as I added the mountains.

At this point I had to decide what to do with the section to the far right. These cabinets are a little over 12 feet long and 4 ft high.

My plan is to add a sink under the shorter cabinets when I eventually get the water running to the studio.
You can just see where I added a white path to the far right.


Here's a closer look at the left side below after I added details

Bringing in a middle ground and foreground
A friend sent me some stunning photos of Texas bluebonnets and Indian paintbrushes and I had my plan for the right hand side!

See what's been added!
DONE!
So there you have it-a soothing mountain view with birds, flowers....forgot the butterflies but hey I can add them later :-) So be brave-paint a door panel, closet doors, kitchen cabinets or anything else that strikes your fancy! And it you want to take it with you at some later date, just paint it on some lightweight plywood (birch is good) and screw it to the surface.
Go paint!

Monday, April 13, 2015

Getting creative with murals on wall cabinets

So in earlier posts I shared how we have been renovating what was originally a storage shed and turning it into my silk/misc art studio! It has been a "do it as I can" project in terms of time and money but now, well, with a few small exceptions, it is ready to start moving into!


I painted a 3' x 7' mural on panel in our big studio to add under the old cabinets (scrounged from a torn down kitchen). Note my palettes of Styrofoam plates :-) Just used acrylic, water based artist's paint that you can find in the art stores for this.

The far end of the small studio has a work counter and although I wanted to put it underneath, it would not fit without cutting it in half (due to counter bracing).  And I did not feel like cutting holes in it to fit around electrical outlets....so under the cabinets it went!

The cabinets themselves apparently came from a very old kitchen and the shed wall was reinforced with that rough OSB plywood that is a real pain to paint.

 The shop size is 12 x 20 and I am just about to move into it this week. No running water yet but I have electrical so that will work until I get the waterline in. Thanks to Craigslist, I have already located a used stainless steel sink with the deepness I needed, plus all the fittings for a mere fraction of what it would have cost otherwise!


As you can see, I  have gotten as far as putting in a sky. Originally the very dark, heavily varnished cabinet doors would not hold any paint until I sanded them (sigh) Now the skies are a backdrop to what other scenes or subjects I will add, which is still undecided! This is a project anyone can do on their kitchen cabinets...the laundry room...kids' doors...be bold. Painting on panels means it can be removed at any time! 

Cabinet doors ready for their paintings!


Wednesday, April 8, 2015

Sharing the "How to's" of art


Helping others learn to see and then paint what they see (real or unreal) can be an inspiring way to plug into my creative side!
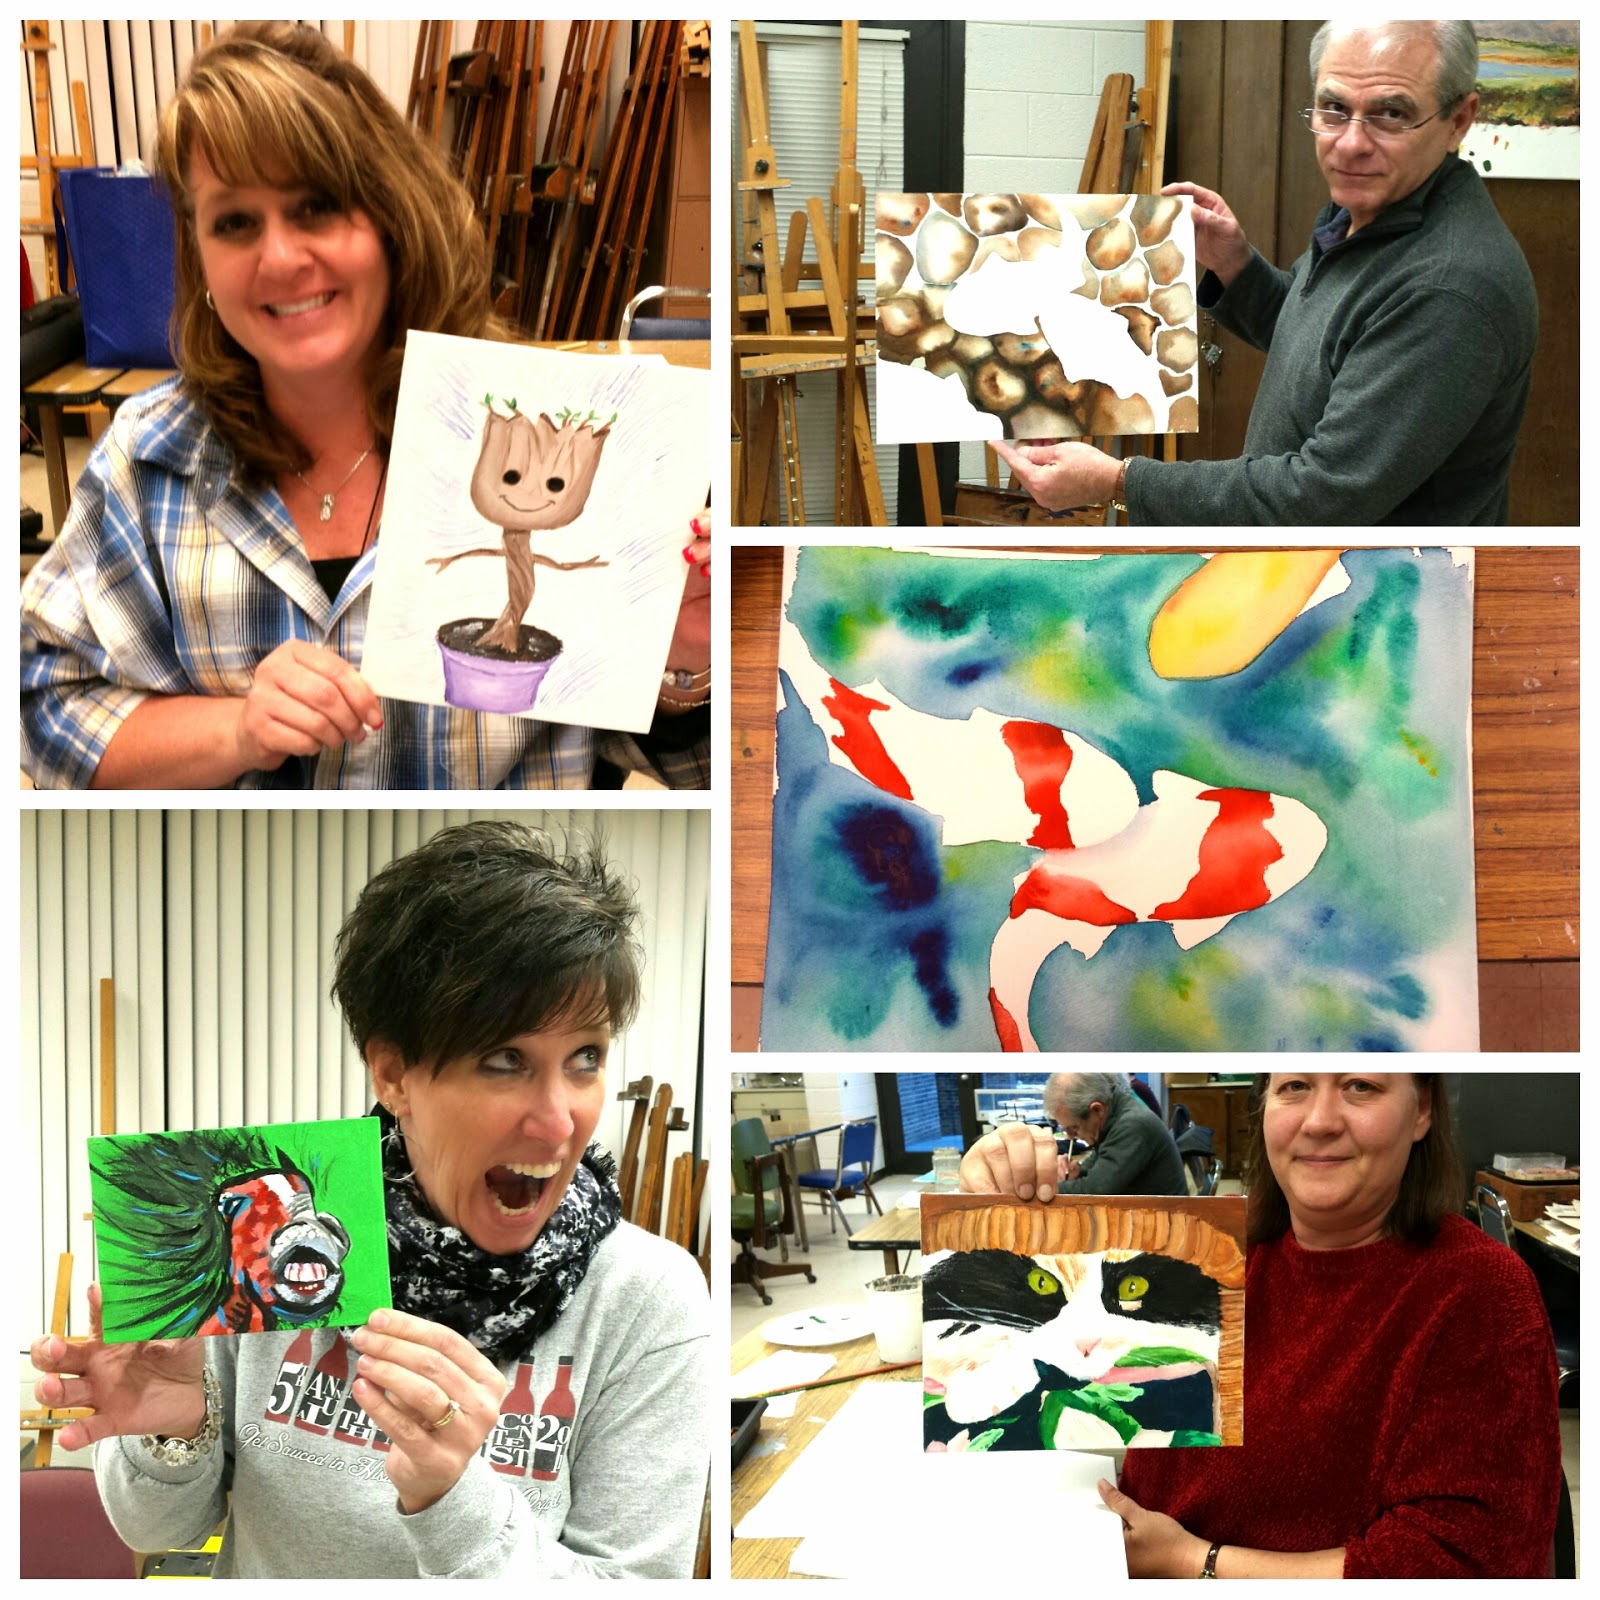
Teaching some art classes at the Vance Granville Community College to both newcomers to art and those who have been in it awhile, in an open classroom environment, is a great way to tap into my dormant knowledge.   Working in acrylics, watercolor, and in the case of one student-in fabric collages, they simple let their creative sides flow in class.

Nowadays many use their smart phones to find images to paint from (inspiration) and in

Acrylic and watercolor 
 doing so follow that age old tradition of looking at work they admire and trying to emulate it.!

Enjoy the creativity...the fabric/lace embellished on is below!


Thursday, March 19, 2015

Going to the dogs...artistically!

After finishing up 2 weekends...long weekends..... of shows, I found myself going to the dogs. On my easel.
I already live with 5 dogs and with a background that once encompassed dog shows, dog training and pet boarding (with a 100 run kennel no less!) I find it as easy to return to a life with dogs as I do with horses :-) 

Our pets occupy a special place in our hearts and it's easy to see why my collectors love to have  portraits of these special families members created. And I have created hundreds...perhaps thousands, over the years! 
At these last two shows I created Jack Russell Terriers and a Corgi puppy. Both are two of the most popular pups at the horse shows although I am seeing more and more mixed breeds-a nod to the efforts of  dog and horse rescue groups that work hard and diligent to place their charges in the best homes possible!   The "Tiny Urls" take you to my Etsy store where you can see these much larger!

All 3 are available as originals, for purchase :-)

http://tinyurl.com/nueldyg

http://tinyurl.com/oznpjqf

http://tinyurl.com/o5m5rcn


Going to the Dogs is a special place I think. When it comes to your canine companions, every day is a good day! And that is a nice place to be :-)


Friday, March 13, 2015

Art studios, landscaping and chickens...

Finally! Warmer weather! My poor ponies have a sea of dried mud around their run-in shed that will again turn to mush with the upcoming expected rains but MAYBE there will be a week with no rain, snow or mix after that! 


So the renovation on the small studio is drawing to a foreseeable end...at least the walls are painted-white. I cannot bear the thought of anymore interior darkness! Hubby Steve is putting in the work counter...same height as a bar-that could be nice too!


I have been doing some raking and semi-landscaping. What that really means is that there was wire  along the edges of the pasture fence that the pretty vinca flower vines had grown through and covered so I have actually had to use a pick ax, short and long handled pruning clippers to get up...a lot of it. I guess I noticed it but then did nothing about it...just ran the lawnmower around that nice long clump of dark green vines with their purple summer violets.   After I finally spent 2 days yanking, digging and chopping at it all, the wire is up....followed by curious chickens who went to work digging in dirt I had conveniently already "undug" for them.  


We are at a show right now so other than popping up an image of a recently completed and now shipped painting, I am off to make some sales today (always a good thought-heck it's the goal!)


Follow my journey with me and see how I set up the inside of a 12 x 20 studio!


Zues-16 x 16 pastel

Wednesday, February 25, 2015

Cabin in the Snow! The renovations continue!

A cabin in the snow! The art studio journey continues.


So here we are at the end of February 2015 and the "cold winter" predictions have come true!


Just one of a number  this winter!

Last winter collage and our cabin before renovations!
New England continues to dig out from yet another snowstorm...I think I read 7 feet of snow in 4 storms in 1 month! And we wait for a new system to come in tonight-one in which NO one seems to know what will happen (ice, sleet, little snow, lots of 
snow?)


We have purposefully kept our large art studio cooler since we don't want to burn through too much propane. That means I can move a lot of my silk work inside the house to my office. 

There is a definite space advantage after the kids leave home!

IN my next post I'll share some of the silk projects I am doing but right now here are a few of the images of the progress we are making with our "Cabin in the Woods" which will actually be a smaller studio but still a cabin feel to it!

Enjoy our DIY efforts!    (this post is an excerpt from my Artsy Journeys blog!)


My artist hubby working late at night (with the help of a portable heater)

The mudding of the sheetrock is now DONE!

Friday, February 6, 2015

Grownups Art Camp May 9 from 10-3!

Oh my, the kids have loads of fun in one of our Art Camps! In our summer camps out here in the country our kids have a blast every summer!  Last summer they got dirty, played outside, played games, ran through water streams from the hoses, created loads and loads of art, loved on the ponies and the dogs, picked blackberries, ran through the secret trails, collected eggs, climbed the trees and in general, just had kid fun.Take a look below!

A few scenes from one of our summer art camps!


But as the parents said, "Why should the kids have all the fun?" Yep-that's what we thought too!
So we decided to have a 1 day "ArtEscape" camp just for the grownups on the Saturday before Mother's Day-May 9 from 10:00-3:00. No one under 21 simply because you can BYOB AND it's your adult summer/spring camp experience! It's only $45.00 per person-dress to mess, bring a sketch pad and a bagged lunch (with your favorite beverage) We supply all the rest! Oh and if you want to BYOB-feel free!
 http://artstudentacademy.com/Grown-Up-Artescapte.html


Our second, little studio will be open and the new deck is perfect for the grownup kind of relaxation...so maybe you don't want to climb a tree, but the trails are fun, the roses will be in bloom and we'll work on several amazing indoor and outdoor art projects! 


http://artstudentacademy.com/Grown-Up-Artescapte.html

Don't miss out!

Related Posts with Thumbnails